MYOG: Fire Starters On The Cheap

Quick and Dirty
Cost: $
Time: 30 minutes
Difficulty (1-10): 1

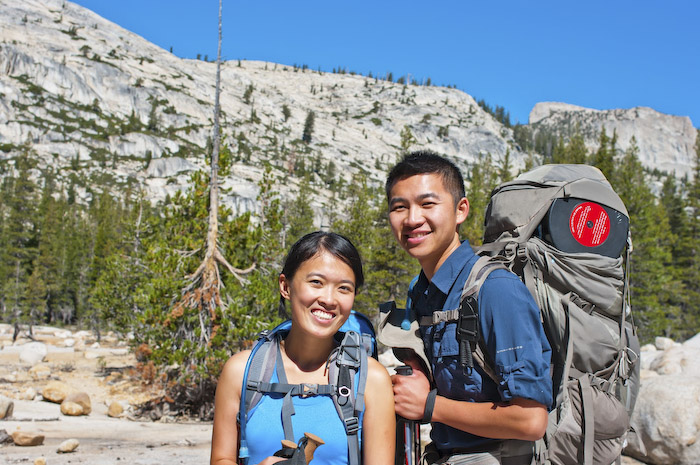
Below is a quick and easy tutorial on how to take dryer lint and turn it into an effective fire starter.  We use these on all of our back country trips that allow fires.
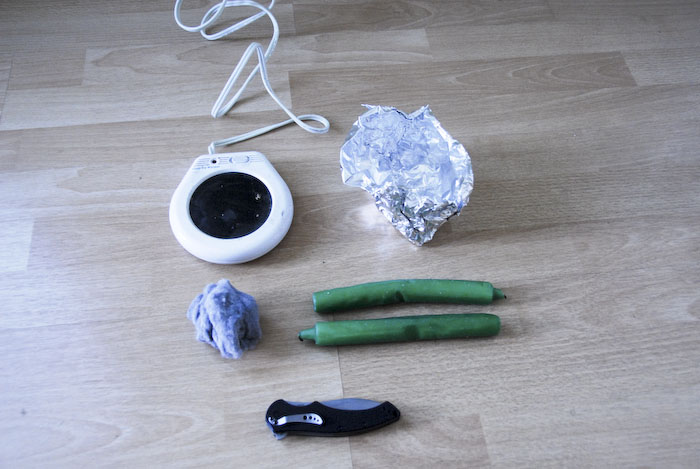
DSC_0186

What You Need
Lint from a dryer
Old candles, used candles, or residual wax
Heating device (heat gun, candle warmer, fire!)
Knife

Step 1

Wash your clothes and throw them in the dryer.  Save the lint that’s collected in your dryer.

DSC_0193

Step 2

If using long candles, cut them into bits and pieces for easy melting.

DSC_0198

Step 3

Put pieces in a heat resistent bowl that you don’t mind not using ever again.  I made a bowl out of tin foil.

DSC_0209

Step 4

Use a candle warmer or some type of heating device to melt some UNSCENTED candles. It’s very important to use unscented candles in the backcountry.

DSC_0205

Step 5

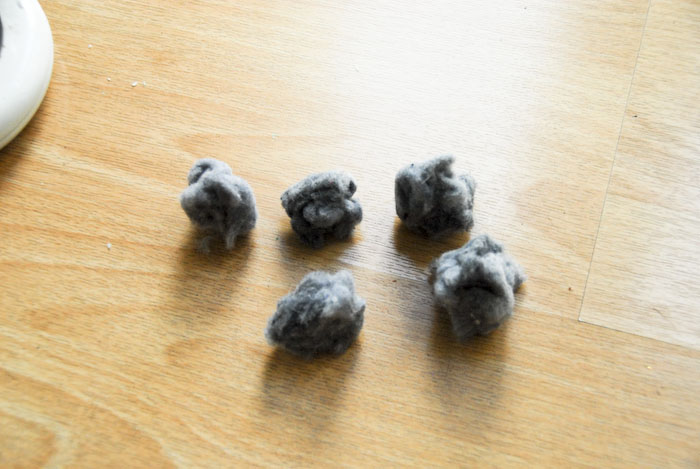
Form a ball with the dryer lint.

DSC_0211

DSC_0213

Step 6

Submerge HALF of the lint ball into the melted wax. The uncovered half of the lint ball acts as a candle wick and will burn faster.

Firestarters

Step 7

Pull them out and let them cool and harden.
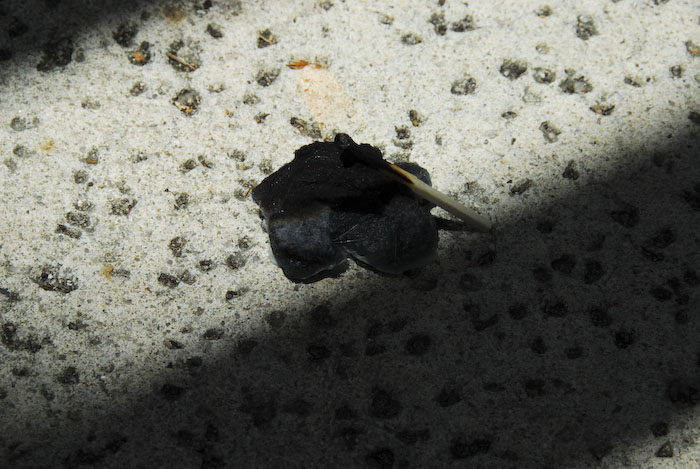
DSC_0224

Step 8

To correctly light the fire starters, you need to stack small sticks and kindling above the fire starter.  Light the exposed portion of the fire starter.  Making sure there is enough oxygen to feed the fire, allow it to burn and melt portions of the wax until your kindling and sticks catch fire.

These dryer lint balls are easy to make, light weight and cost virtually nothing. On a cold wet morning, a nice warm fire will make a huge difference.  There are other options (newspaper, saw dust, etc.), but lint is FREE and easier to work with.

Final note:  I highly recommend  using unscented candles.  We use whatever we have left over, but we prefer to use unscented, inexpensive stick candles.  They typically cost a dollar for8 at the local dollar store – of if you are like us, you have a bunch of them around the house.

Gear Overview: LiteTrail Titanium Cook System

Quick and Dirty
Gear Type: Stove/Cook System
Fuel Type: Esbit Solid Fuel Cubes
Material: Titanium
Trail weight: 3.50 oz
Price: $89.95
Link:  LiteTrail Titanium Cook System (2013)
Pros: Light, Compact, Simple, Reliable, and Versatile.
Cons: Esbit stinks, leaves residue on your pot, line locks snap.

LiteTrail Stove

Continue reading

Young Lakes, Yosemite National Park, California

The Quick and Dirty:
Location – Yosemite National Park, Young Lakes
Distance – 24 miles one way
Terrain Type – flat to gentle slopes, northern Sierra Nevada region
Difficulty – Moderate Strenuous
Best Time – Summer and Fall
Special Conditions –  US national park, entrance fee required upon arrival, backpacking permit also required.

Duration– 4 days

Louis and I spent labor day weekend backpacking at Young Lakes at Yosemite National Park with a few friends. We left Friday morning and drove up to Yosemite National Park’s Eastern entrance off the Tioga Road into the Tuolumne Meadows. It took approximately 6 hours to drive up to the national park from Southern California. Lodging is $5 a night for backpackers at Tuolumne Meadows backpackers campsite. We planned to meet the rest of our camping party at the campsite on the first day but never found the campground. Instead, we drove all 20 miles east on Tioga Road to Porcupine campground and setup camp there for the night. We did manage to find our friends some time later at the backpacker’s campsite and convinced them to move over to the Porcupine campground since it was close to our starting point the next day:) Porcupine was fine for a car camping campground. We were stuck next to some very loud neighbors and did not sleep very well that night, which reminded us why we enjoy backpacking so much more.
This was our plan for the weekend. We were not able to obtain a backpacking permit from Dog Lake so we opted for the longer hike starting at Murphy Creek and ending at Dog Lake on Monday.
IMG_1311
First day, at our lunch spot. The weather was about 75, still too cold to swim in the water.
IMGP1614
I brought up the topic of us always wearing the same clothes during backpacking trips to Louis. We are considering wearing something different on our next backpacking trip.
IMGP1739
We found a campsite 1.5 miles away from the Glen Aulin junction and stay here for the first night.

IMG_1312

Really beautiful waterfall next to the High Sierras Glen Aulin campground on our hike the second day. It was a minor detour on our way to Young Lakes

IMG_1315
IMG_1319

Day two at one of our peaks.

IMG_1321

Even the beautiful view could not cheer Edwin up. Ammar is giving Edwin a pep talk about backpacking.

IMG_1330
We arrived at Young Lakes and camped at the lower lake. After everyone went into the lake for a dip, we napped and ventured up to the upper lakes. Next time, I think I’d prefer to camp at the upper lakes.

IMGP1825

Alpana, Lisa and I discussing where we are going to eat once we leave the next day. Dinner plans at Tasty Garden in Alhambra for the next day was decided shortly after the photo was taken.

IMG_1333
Sun setting, kind of reminded me of Columbine Lake at Mineral Kings.
IMG_1337
Enjoying dinner by the lake
IMG_1340
IMG_1342
 Day 3, hiking back to Dog Lake’s parking lot.
IMGP1861
Last photo of the group (with Ammar as the photographer) before saying goodbye to Yosemite.

Salmon Creek, Big Sur, California

We spent the last weekend of August driving up to the southern tip Big Sur and backpacking Salmon Creek Trail. Louis, Chis and I took off Friday morning from Mission Viejo. Salmon Creek Trail is a part of the Los Padres National Forest, no permit is required for overnight camping, however, a fire permit is required if we wanted to use a stove or start a camp fire. We realized 10 minute into our trip that neither of us had a fire permit and decided to make a little detour to Angeles National Forest ranger station to pick up a fire permit and have lunch.
The drive took about five hours from San Gabriel valley. As always, Highway 1 is scenic and beautiful. The Salmon Creek Trail head is approximately 20 miles north of the Hearst Castle turn off or 3 miles north of the Ragged Inn. The parking lot for the trail is easy to spot it is after a big bend on Hwy 1 shortly after passing the Inn.
Hairpin right before Salmon Creek trail parking lot.

Our goal was to hike to Estrella camp the first night and do a day hike to Coast Ridge Road on  Saturday.

 Dakota and Estrella Camp

It was a crowded weekend, we managed to find one last campsite near the creek in Estrella, and the creek was running! I was a little worried about the availability of water at the creek since it’s been such a dry year.

Overlooking the Pacific ocean, it was an overcast day.

Poison oak was everywhere on the trail. It completely covered the trail at parts between Estrella and Coast Ridge highway.

 Dakota helping Louis filter water from the creek.
My friends from Norcal met up with us on Saturday morning. Dakota and Bubo became immediate friends.
Louis was attacked by a nest of yellow jackets on our way into Estrella. This is how we prepared for them on our way out.

Mount. San Gorgonio, San Bernardino National Forest, California

We backpacked Mt San Gorgonio last weekend with Dakota. It was her first backpacking trip and she finished the entire trip like a champ!
Louis, Peter and I left Saturday morning at 5AM, Mt. San Gorgonio is located near Redlands by the 215 and 15 freeway. It is within the San Bernardino National Forest so dogs are allowed on trail. A permit is required for overnight camping, we had to fax in the permit to the ranger’s station 5 days before the hike. We arrived at the ranger’s station at 8AM and picked up our permit. The drive from the ranger’s station to the camp site is about 30 miles. From Hwy 38, make a right into Fish Creek Campground, the roads are rocky, high clearance vehicle is recommended, however, we made it in okay with our Mazda Protege.
The elevation at Fish Creek is 8160 feet, Louis is prone to altitude changes so he took the hike slow with Dakota. From the parking lot to Fish Creek campground is 2.6 miles. Water is abundant first week of August within the first 2.6 miles, the hike was easy and the weather was perfect, it took us 1 hour to get to the first camp ground. Half a mile from Fish Creek campground to Fish Creek Saddle is the last water supply before Fish Creek Saddle. We filled up our water packs full and set out for Fish Creek Saddle. The hike from Fish Creek campground to Fish Creek Saddle was 2.3miles but the altitude gain was tremendous and it felt like a very difficult hike since most of the trails were exposed to sun.
Dakota hiking behind Peter on the way to Fish Creek Saddle campground
We got to Fish Creek Saddle campground around 1:30PM, the next nearest water is on the way to dry lake and the water source looked murky and filled with algae from far away. We decided we had enough water between the three of us to climb Mt San G, and opted not to refill at the lake.

Dakota chilling at the campground before we set out for the Mt San Gorgonio climb

On to way to the peak
The beginning of switch backs and climb, we had no idea what we were getting ourselves into!

Perfect weather, breezy 70 degrees.

Rain clouds moving in
On our way to the peak we spotted the1950s military cargo plane crash site. The cost of salvaging the plane was too much, the debris’ been left here at the crash site since the incident.

The last half a mile of the hike was tough, the switch backs seemed never ending. Make sure to go right for the peak and follow the sign.

Peak photo. It was 6.5 miles from Fish Creek Saddle to the peak at 11502 feet above mean sea level. Near the top, I definitely felt the altitude and had trouble breathing. We had to slow down our pace considerable. Dakota was too preoccupied by chipmunks to take a good group photo.

Louis proposed at the top! He was suffering from a mild case of altitude sickness. The speech he had prepared went out the window and he got straight to the point. 🙂

Dakota with her backpack ready to explore the woods
Dakota at the top of Mt San Gorgonio
By the time we got back to our camp site at Fish Creek Saddle it was 7:30PM. It took us 5 hours to hike 13 miles up to the peak, not too shabby. We went to sleep and woke up next morning at 6AM. Because we are running low on water at this point, we skipped breakfast and decided to hike down to Fish Creek camp and refill. The hike down to Fish Creek camp took much less effort and we were out to the parking lot within 2 hours.

Once last family photo before the parking lot.