JMT Devils Post Pile to Yosemite – Day 2 – Ruby Lake to Lyell Canyon

Our goal for the day was to traverse over Donohue Pass into Yosemite Wilderness, stopping short of Kuna Creek and the camping prohibition zone.

img_20160829_085419

The Quick and Dirty:
Location: 
Ruby Lake to Lyell Canyon (over Donohue Pass)
Distance: 11-12 miles
Difficulty:  Strenuous
Duration:  N/A

Continue reading

Advertisement

JMT Devils Post Pile to Yosemite – Day 1

The hike from Devils Post Pile to Ruby Lake was nearly all completely up-hills.  Along the way, we passed Rosalie Lake, Shadow Lake, Trinity Lakes, and Garnet Lake.

img_20160828_175556

The Quick and Dirty:
Location: 
Mammoth Mountain Adventure Center, Devils Post Pile to Ruby Lake
Distance: 12 miles
Difficulty:  Strenuous
Duration:  N/A

Continue reading

JMT Devils Post Pile to Yosemite – Day 0

We drove two separate vehicles and parked them at each end of the trail for easier transportation.  The drive was long and traffic was terrible, due to the National Park Centennial.

IMG_20160827_135631.jpg

The Quick and Dirty:
Location: 
Yosemite Valley Happy Isle Trail Head, Mammoth Mountain Adventure Center
Distance:
Day 0 – Varies, Happy Isle Trail Head and Mammoth Lakes Adventure Center
Difficulty:  N/A
Duration:  N/A

Continue reading

Overview: John Muir Trail – Devils Post Pile to Yosemite Valley

After last years fires in the Sierras smoked us out of our John Muir Trail section hike, we got permits to attempt to do it again this year.  Unfortunately, S could not make it this time and instead a few of my friends (A and E) joined me on the trip.

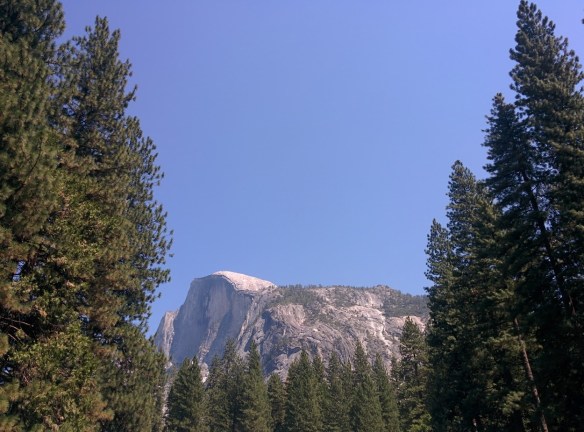
The schedule was fairly aggressive and it really pushed the hiking team.  While S and I both comfortably hike 15-20 mile days, the other two have never done more than nine miles a day.  We followed as closely to our original itinerary as possible, but having been issued walk-in permits for Half Dome, we accelerated our schedule to meet our permit date.  The number of people on the trail during this time of the year also made it very difficult to find suitable camp sites.

A few quick notes: Yosemite recently changed nearly all of the names throughout the valley, I used an old map and it made it difficult to locate where I was going.

img_20160829_090729

The Quick and Dirty:
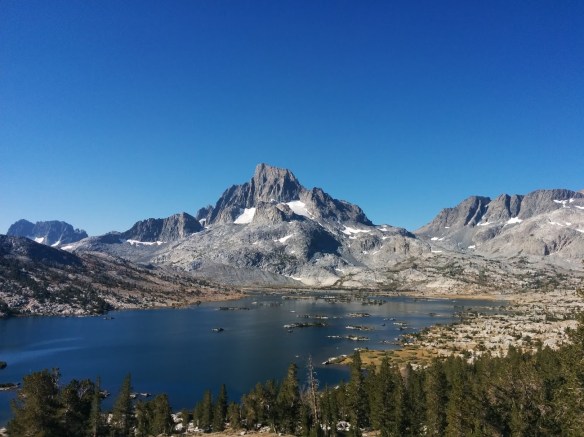
Location: 
John Muir Trail (JMT), between Devils Post Pile to Yosemite National Park
Distance: Approximately 50 miles (+/- a few for Tuolomne Meadows)
Best Time: JMT suggested times (typically August through September)
Duration: Four days (+)
Permits and Restrictions: Permits can be obtained through www.recreation.gov.  Make sure to obtain a fire permit online or at the ranger’s office if you plan on using a stove for cooking. A bear canister is also required for this trail and available for rental at the local ranger station.  Permit pick up at Mammoth Welcome Center (night box options OK).

Continue reading

Tide Crossing at Olympic Wilderness Area

This post is a part of the series for backpacking at the northern portion of the Olympic Wilderness Area from Ozette ranger station to Shi Shi Beach. We had trouble finding good resources describing the all the high tide crossings between Ozette ranger station and Shi Shi Beach when we planned our backpacking trip and thought it would be useful to document all the crossings in a blog post for future use.

Before I dive into the specific high tide crossing areas, there are some good to know facts regarding high tide crossing throughout this trail outlined below:

  1. Water resistant shoes are very useful throughout this trail as the probability of rain and getting your feet wet during tide crossings are high. I did not bring water resistant shoes on the hike and ended up getting my feet wet during a couple crossings. It wasn’t a huge deal for me since it was a short trip and I always had extra wool socks to change into.
  2. Hiking poles are super useful for boulder crossings. They provide better support and balance as you make your way around the slippery rocks.
  3. A detailed trail map with passable tide heights can be purchased at the WIC in Port Angeles. This is a very user friendly map and it’s important to have this map to understand when the section will be impassable. Since we completely missed Port Angeles on our way to the trail-head, we just took snap shots of the map and referenced it on our phones.

    IMG_20160514_122318.jpg

    Snapshot of a friendly hiker’s tide map

  4. Print out a current month tide table to accompany the trail map. The tide tables can be found HERE. Be sure to print this out to understand when the low and high tides are as they change on a daily basis.
  5. Bring gloves for the overland trails! The ropes are rough and will cut into your hands as you use it to pull yourself up.IMG_20160514_190052.jpg

Continue reading